
Addbase3dmodel
Start creating
English

Beginner modeling guide

A practical add base 3d model tutorial for beginners

Start with the shape your model needs beneath it, not a random slab. This guide walks through planning a base, joining it to the subject, and checking the result before you print.

Free to start · no signup
Illustration of a 3D model displayed with a supporting base

prerequisites

Before changing the mesh, decide what the base must support and how you will judge whether it works.

  1. 1

    Inspect the underside

    Open the model in a 3D editor or slicer and find its lowest points. Note whether the subject touches the ground at one small spot, several separated spots, or a broad flat surface. Rotate the view to catch feet, clothing, or decorative details that extend below the apparent bottom.

  2. 2

    Choose a base shape

    A disk suits many figurines, while a rectangle may fit a machine part or architectural piece. Pick a footprint wide enough to support the subject without hiding details. Decide whether you want a plain platform, a shallow plinth, or a base that follows the outline.

  3. 3

    Keep an editable copy

    Save the untouched model before modifying geometry. If you plan to print, also identify the intended upright orientation and check that your editor can export a format accepted by your slicer. An editable source makes it easier to revise the footprint later.

numbered steps

Use this sequence for a simple attached base; the related guides cover specific tools and printing decisions.

common errors and fixes

These checks compare a visible symptom with the correction to try before exporting again.

What you notice
What to check or change

Base floats below the model

What you notice

A gap appears in side view, even if the top view looks aligned.

What to check or change

Move the base or subject vertically until their volumes overlap; inspect the joint from multiple angles.

Pieces separate in the slicer

What you notice

The platform and subject can be selected or sliced as independent objects.

What to check or change

Join the geometry with an appropriate union operation, then re-export and inspect the resulting file.

Base clips a visible detail

What you notice

The platform cuts across a foot, hem, label, or lower edge.

What to check or change

Lower the platform, reduce its top height, or reshape its outline while preserving enough contact.

Model seems unstable

What you notice

The subject overhangs one edge or appears off-center above a narrow footprint.

What to check or change

Widen the base or reposition the subject; inspect the silhouette from front, side, and top views.

Underside is uneven

What you notice

A protrusion extends beneath the platform's intended bottom plane.

What to check or change

Inspect the lowest geometry and make the base underside flat before preparing the print.

Unexpected holes appear

What you notice

The union leaves missing faces or a slicer preview shows an inconsistent surface.

What to check or change

Check the source meshes for open edges or intersecting surfaces, repair them, and repeat the join.

advanced tips

Once a plain base works, adapt its outline and presentation to the model rather than adding complexity by default.

Figurine maker

A character stands on two narrow feet and needs a display-worthy footprint. Try a low oval platform that follows the pose without extending far beyond it.

Check both feet for solid contact, then view the silhouette at display height. A decorative rim should not conceal the lowest details.

add base 3d model examples

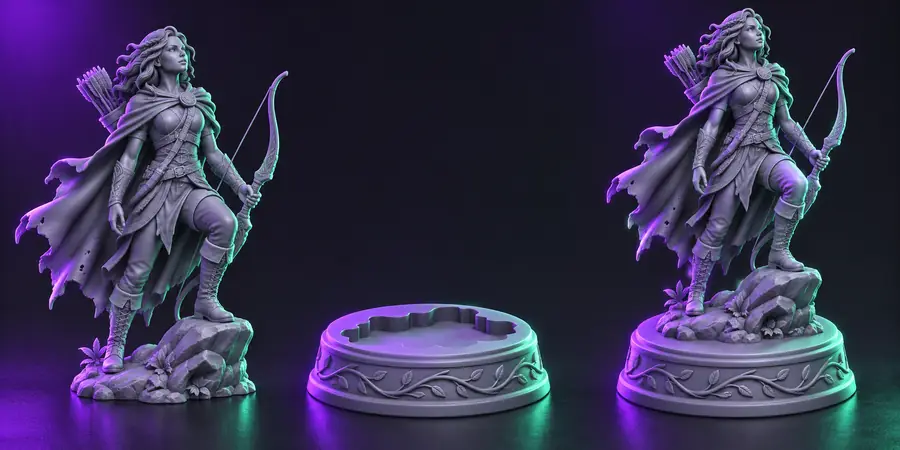
Concept designer

You are exploring several possible pedestal shapes before committing to detailed mesh work. Keep the subject unchanged while comparing a disk, a square plinth, and a stepped profile.

Judge each option by footprint, visual balance, and whether the base competes with the subject.

add base 3d model online

Mechanical modeler

A small part needs a broad foot for display or testing. Measure the intended contact area and keep functional faces clear of the platform.

Inspect the assembled shape in section or close side view so the base does not interfere with the part's intended fit.

add base 3d model alternative

First-time model editor

You are not sure whether a pedestal, a print brim, and temporary support serve the same purpose. Identify whether the feature must remain on the finished object.

Model a permanent base only when it belongs in the final design; use print-preparation features for temporary printing needs.

what is add base 3d model online
Illustrative model view used to discuss planning a supporting base Plan the contact
Illustrative round pedestal design for a model Review the pedestal
These are illustrative references, not a verified before-and-after export of the same mesh. In your own editor, compare the original and joined model from matching angles, especially underneath. Confirm that the new platform is centered, has a flat bottom, and does not cover details you meant to preserve.

Take your base idea into a 3D workflow

Write down the model's shape, the footprint you want, and whether the base should be permanent. Addbase3dmodel can point you toward the linked 3D studio to explore your concept; inspect any resulting geometry in your own editor before treating it as print-ready.

Explore base concepts
  • Describe the subject and the intended footprint
  • Check the joint and underside in an editor
  • Preview the exported model in a slicer before printing

tutorial FAQ

A plain disk or rectangle is easier to position and inspect than a detailed, irregular platform. Start with a footprint that supports the subject, then change the outline only if the simple shape obscures details or looks out of balance.

No. The core tasks are placing a solid, checking overlap, joining geometry when needed, and inspecting the result. The names and locations of those commands vary between modeling applications.

The modeling principles do not depend on a paid application, and some editors offer tools for basic mesh work. Check the terms and capabilities of the particular editor you choose; this guide does not establish the access conditions of the linked 3D studio.

Objects can look connected in the viewport while remaining separate meshes or touching without a solid overlap. Inspect the joint, perform a union if your workflow needs one continuous mesh, and check the exported file in a slicer preview.

Look for a flat underside, adequate contact with the subject, and no unintended gaps or protrusions. Then review the exported file layer by layer in your slicer; a good-looking modeling view alone cannot confirm a clean print path.

Open 3D studio Start creating