Addbase3dmodel
Start creating
English

Practical workflow

How do I add a base to a 3D model — two reliable paths Two reliable paths

How do I add a base to a 3D model without losing alignment or creating a weak print? This guide separates editable model work from slicer-only support, then shows the checks that make either route dependable.

Prompt goes to the studio
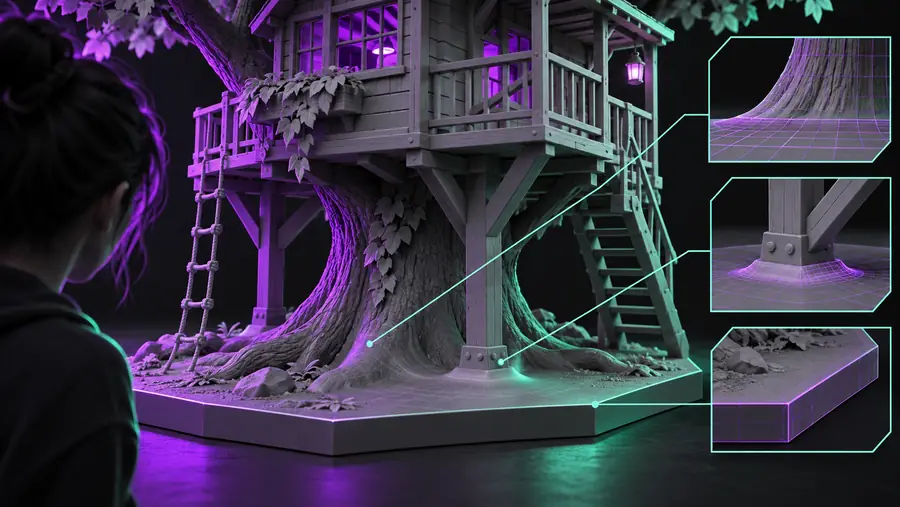
3D model displayed with a fitted base

Decide which case you are

Choose the route based on what you can edit and what you need the base to accomplish. A support added in a slicer is not the same as geometry built into the model.

You cannot repair a broken mesh by adding a base

A base may hide the bottom edge, but it will not fix non-manifold faces, inverted normals, or open gaps in the original object.

Workaround

Run the model through a mesh-repair tool first, then attach or position the base.

A slicer base is not permanent model geometry

A platform or support added during preparation usually exists only in the print job and will not travel with the exported model.

Workaround

Use a modelling workflow when the base must remain part of the STL or OBJ.

A flat base cannot solve poor balance by itself

If the model is top-heavy or touches the base at a narrow point, it may still wobble or detach during printing.

Workaround

Widen the footprint, add a shallow recess, or introduce a discreet connector.

Automatic generation may miss the intended style

A generated base can be structurally plausible while using the wrong thickness, profile, or visual language for the object.

Workaround

Describe the footprint, edge treatment, height, and intended use before refining the output.

Path A

Use Path A when the base should become part of the model itself. This is the better choice for a reusable asset, a display piece, or any file that must open correctly in another application.

  1. 1

    Inspect the contact area

    Find the lowest stable region of the object and identify whether it is flat, curved, hollow, or irregular. Decide whether the base should touch the entire footprint or only selected contact points.

  2. 2

    Build and align the base

    Create a simple plinth, oval, round pedestal, or stepped form beneath the object. Center it on the model, overlap the contact area slightly, and keep the transition broad enough to avoid a fragile seam.

  3. 3

    Join, test, and export

    Boolean-union or otherwise merge the parts, inspect the new lower edge, and export a repaired watertight file. Reopen it in the slicer to confirm the base is recognized as geometry.

Path B

Use Path B when you only need a print-ready foundation and do not need to change the source asset. The comparison below shows when slicer preparation is efficient and when it becomes limiting.

Modelled base
Slicer base or support

Persists in exported model

Modelled base

Yes, after the parts are merged and exported together.

Slicer base or support

Usually no; it belongs to the prepared print job.

Best for reusable assets

Modelled base

Yes, because the base travels with the object.

Slicer base or support

No, unless the slicer project is shared too.

Fastest for one print

Modelled base

Requires modelling and mesh checks first.

Slicer base or support

Usually faster for a single intended print.

Control over shape

Modelled base

Full control over profile, bevels, recesses, and proportions.

Slicer base or support

Mostly limited to slicer settings and support geometry.

Easy to revise later

Modelled base

Easy when the source remains editable.

Slicer base or support

Easy for placement, but less flexible for detailed styling.

Risk of hidden mesh issues

Modelled base

Needs a deliberate union and watertightness check.

Slicer base or support

Can leave the original mesh untouched, but may expose its defects.

Use across different slicers

Modelled base

Generally consistent after export.

Slicer base or support

Settings and behaviour can vary by slicer.

Unbased 3D object ready for a foundation Before: unsupported footprint
3D object standing on a round pedestal After: fitted display base
The useful change is not only the added shape. The object should sit flat, remain centered, and transfer load into the base without a visible gap or accidental tilt.
primary foundation to align with the model
1 base
visible gaps at the intended contact seam
0 gaps
inspect the model side and the base side before export
2 surfaces
final slicer preview before committing to print
1 recheck

The beginner maker

You have a figurine or small object that needs a simple, stable platform but you are not yet comfortable with mesh operations.

Start with a basic cylinder, oval, or rectangular plinth and follow the plain-language [add base 3d model tutorial for beginners](/add-base-3d-model-tutorial/) before attempting a detailed union.

add base 3d model tutorial for beginners

The asset designer

You are preparing a reusable model for a collection, portfolio, or future edits and need the foundation to remain part of the source geometry.

Choose a modelled base, preserve the original object, and keep the merged result watertight so the finished asset behaves consistently elsewhere.

add base 3d model online

The one-off printer

You only need one successful print and the model already opens correctly in your slicer.

Use a slicer-side base or support, inspect the first layers, and keep the source file unchanged for later experiments.

how to add base to 3d print

The display modeller

You want a visible pedestal with a deliberate silhouette rather than a hidden support structure.

Build the profile into the model, add a small transition or bevel, and compare the final proportions from the intended viewing angle.

add base 3d model examples

Make the base part of a cleaner 3D workflow

Describe the object, the footprint, and the intended presentation, then use the resulting concept as a starting point for a fitted base. Review the geometry before sending it to your modelling or slicing workflow.

Create a base concept
  • Choose a modelled or slicer-side route
  • Check contact, balance, and watertightness
  • Keep the final print purpose in view

Tutorial FAQ

These answers cover the practical question behind this workflow and the related print-preparation concern.

Place a new base beneath the model, align it to the intended footprint, and make sure the two parts overlap or join cleanly. If the base must remain in the asset, merge the geometry and verify that the exported file is watertight; for a single print, you can instead add a foundation or support in the slicer.

Use a modelling tool when the base is part of the design and needs to travel with the file. Use the slicer when you want a quick, print-specific foundation and do not need to change the source model.

Make the footprint wide enough for the model’s centre of mass and ensure the lowest contact area sits flat. Preview the first layers, look for gaps or overhangs, and adjust the base profile or orientation before printing.

Yes, provided the STL can be imported and edited or positioned in your chosen workflow. Repair open edges or other mesh problems first, then join the base for a permanent result or keep it as slicer-only geometry for one print.

Open 3D studio Start creating